

Access the Reservations screen using one of the following 3 methods:
Tip!
When using a POS Terminal which has a POS Screen Resolution of 1920x1080 or 1366x768, the Idealpos Reservations Interface will be left-aligned and the extra space on the right-hand side will be used to display the Table Activity feed.
The Table Activity feed will only be displayed when the Reservations function has been accessed via the Table Map on the abovementioned POS Screen Resolutions.
The Calendar View will open to select the Table, Date, Time and other details.
Select the area you want to reserve by pressing the screen, or making your selection from covers and time.
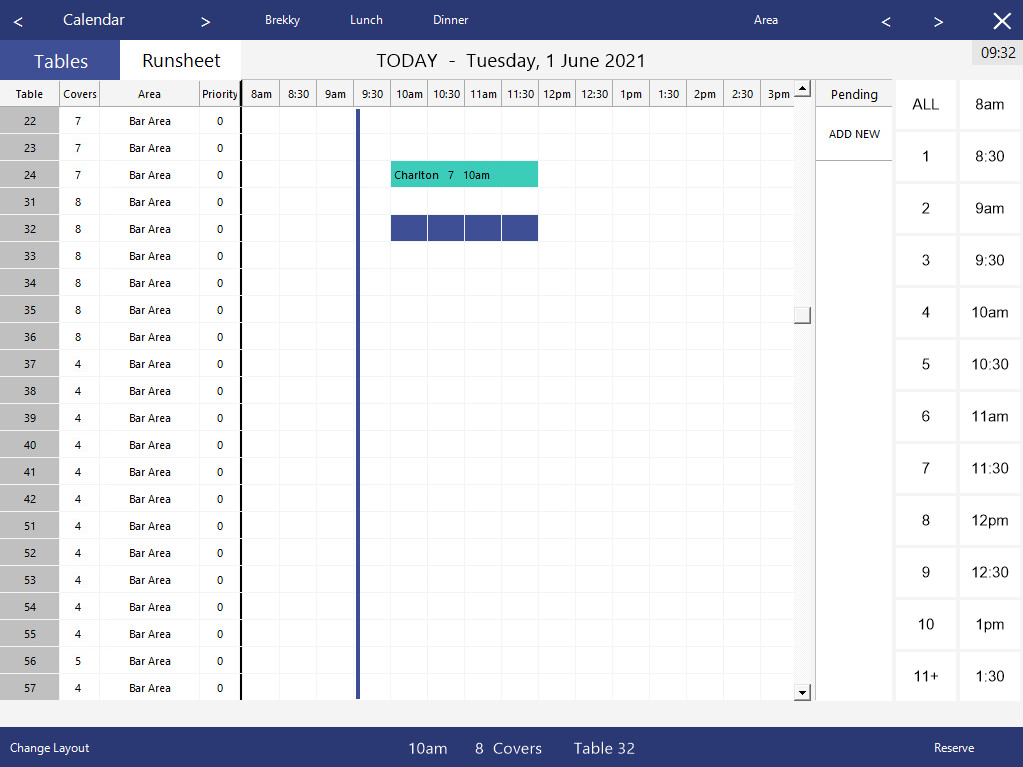
Press the Reserve button at the bottom right of screen to enter the customers’ details.

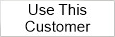
Once you start entering Name details, the Similar Customers screen will start to display any matching customer already in the database.
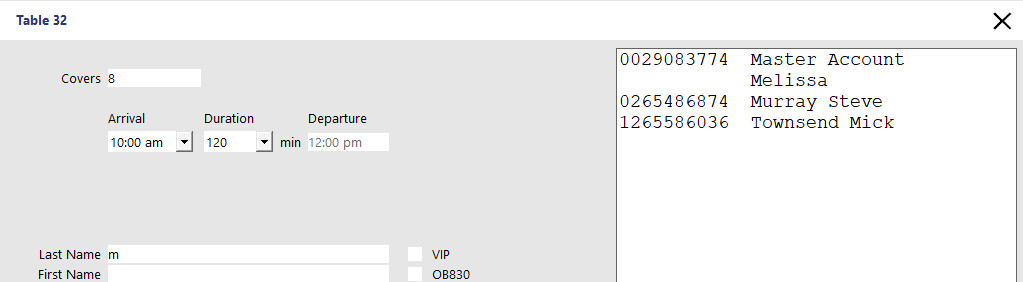
If the customer is not in the database, you will need to enter as many details as you require.
If they are in your database and displaying from the matching customer list, you can press 'Use This Customer' button to add them to the reservation.
Once you have entered all appropriate fields, you can repeat the Phone Message back to the guest to confirm the reservation.

Press "Save" and the Reservation will be added to the reservations time grid on the corresponding date.
When the guest arrives, highlight the details on the time grid, and press Seated.

The colour of the reservation will change to indicate the table has been seated.
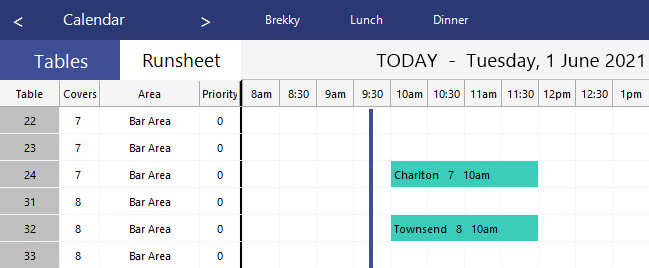
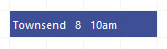
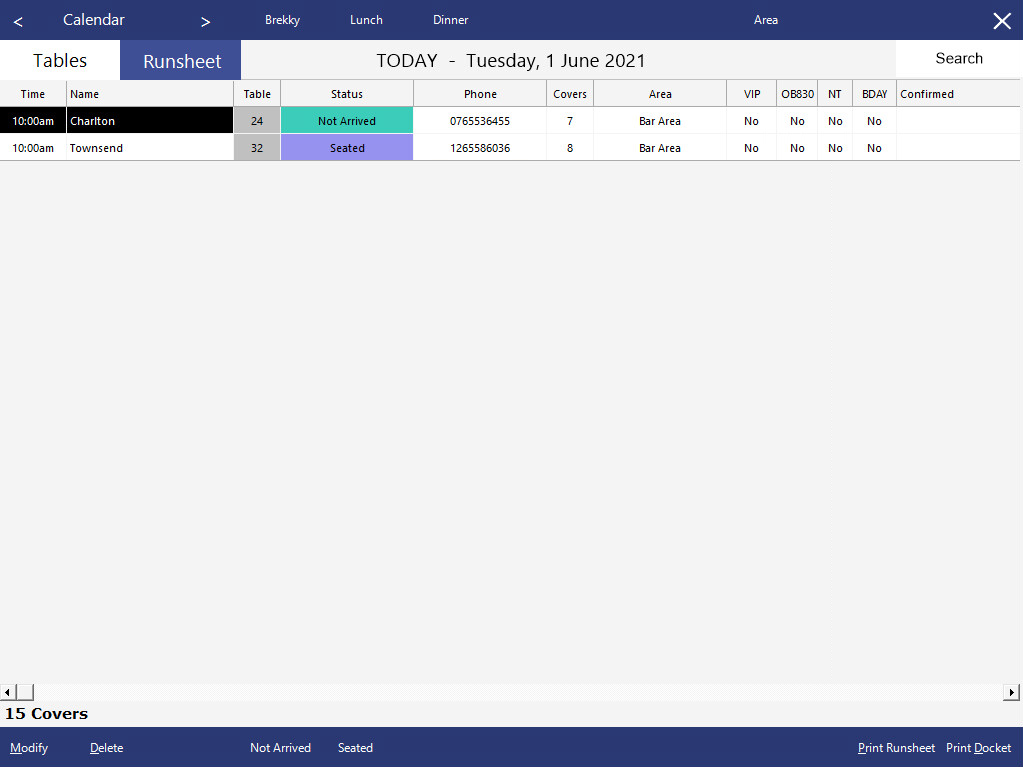
The Runsheet will keep a detailed record of all current reservations for the selected Date and Time.
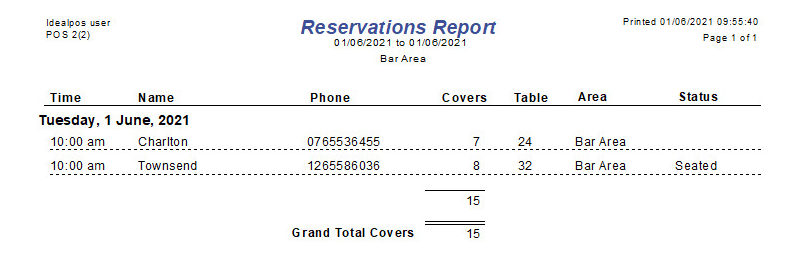
The Runsheet can be printed out to an A4 printer for the use of checking in reservation guests as they arrive.
You can also print a table docket that will print from the default receipt printer, which can be placed on the table to inform all staff of the table’s reservation.
Tip!
User-Defined fields that appear on the right-hand side of the runsheet can be customised.
A total of 10 User-Defined fields are available, as well as two text fields.
To customise and configure these fields, go to: Back Office > Setup > Global Options > Reservations > User-Defined options.
These User-Defined field settings are outlined in the Global Options > Reservations topic.
When printing the Runsheet, you have a selection of choices which can make the report show different details.
These are Date Range, Details and Printer.
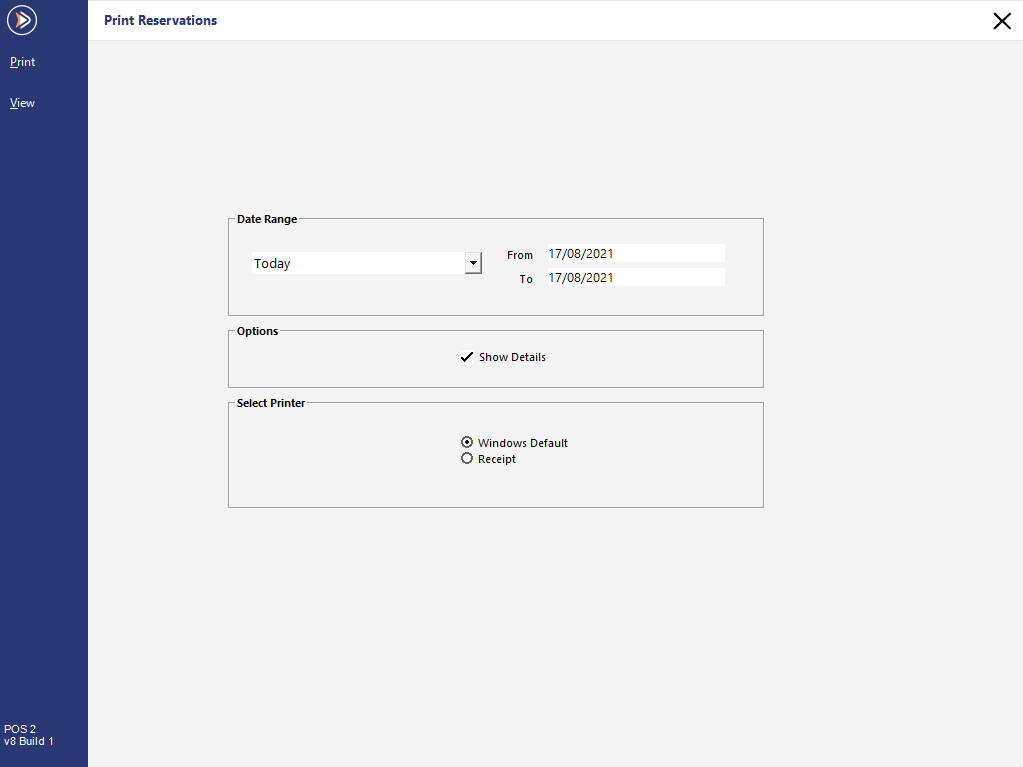
Once you have made your choice, the Runsheet can either be viewed on screen, or printed to a windows printer or receipt printer.
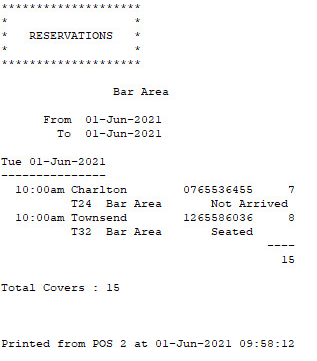
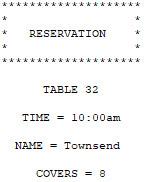
Print Docket will display the Name, Table Number, Time of Reservation, Covers and Comments (if any Comments were entered).
This docket can be placed on the table before setup to help the staff manage the room.